Inventory Overview
 TroopWebHost can keep track of two types of inventory:
- Library materials - merit badge books and other reference items
- Troop equipment - camping gear, cooking equipment, etc.
Each item must be given a unique name or ID. This identifier should be physically attached to that item.
Identifiers can be as simple as "Tent #1", "Tent #2", or "Camping MB #1", "Lifesaving MB #3".
Once you have each item identified, you can enter everything into your inventory database.
Items can then be checked out to troop members and checked back in when they are returned.
Troop members can view the Library Materials and Troop Equipment that they have checked out from the My Stuff menu. They may check out additional items, but they cannot check them back in.
With this system in place the troop will always know where everything is.
Maintain Inventory
Navigate to the Inventory → Maintain Inventory menu to create and update a list of troop inventory items.
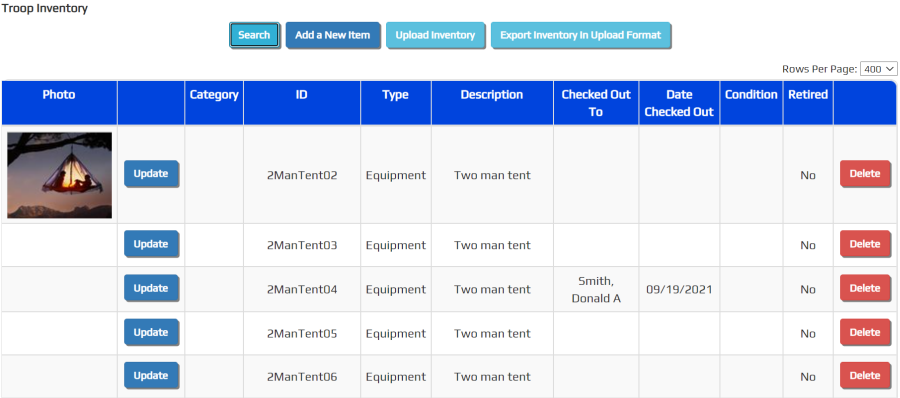
Click Upload Inventory to add or update inventory items from a CSV file.
Click Export Inventory In Upload Format to produce a CSV file that contains all inventory items (except those marked retired) in a format that can be subsequently uploaded. If you open this file in Excel, be sure to save it in CSV format.
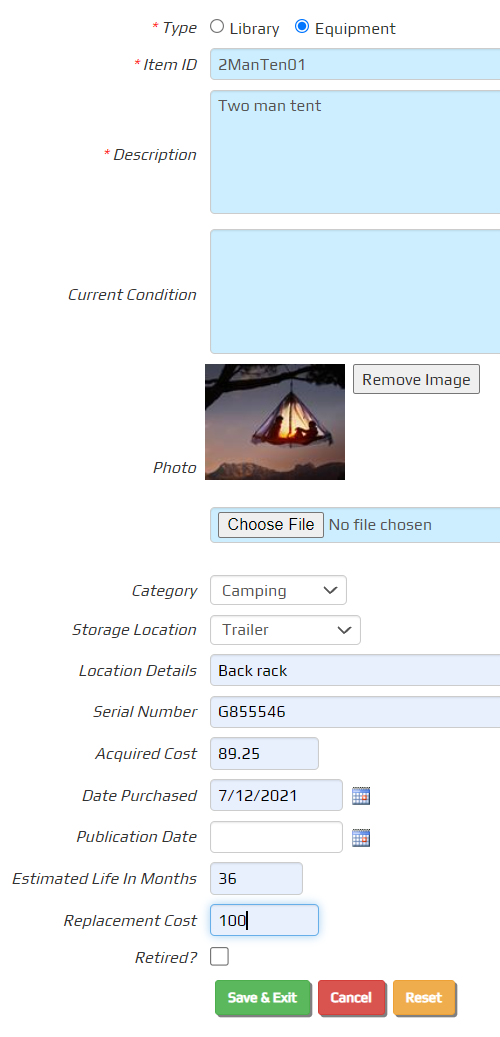
Click Add a New Item to add a library book or piece of troop equipment.
The Item ID must be unique for each inventory item. You cannot have two items with the same Item ID.
You should label each item with its Item ID or write the Item ID directly on the item.
The Description can include the size, color and attributes of the item.
The Condition can describe the current condition of the item and recommendations for repair or disposal.
You may upload one photo showing this item by selecting an image file from the local storage of your device. The phot will be uploaded when you click the Save button.
The Category choices are defined for your unit by going to Site Configuration → Inventory Categories.
The Location choices are defined for your unit by going to Site Configuration → Inventory Locations.
The Location Details indicate a more precise location where this item is stored, such as a shelf or bin number.
The rest of the fields are self-explanatory.
Click Save & Add Another to save this item.
Upload Inventory
You can upload inventory items from a CSV file that you create from Excel or a text editor. The file must be in CSV format, with each value separated from the next by a comma. If a text field contains a comma, then the entire field must be enclosed in quotation marks.
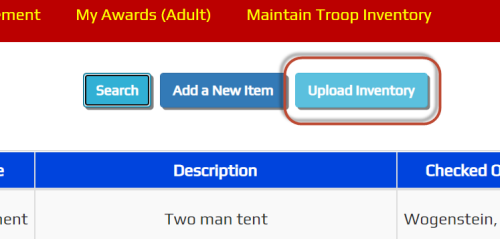
To begin, go to Inventory → Maintain Troop Inventory and click Upload Inventory.
The page provides detailed instructions for creating the CSV file. Please note that the only mandatory columns are InventoryType, ItemID, and Description. The remaining columns are optional and may be omitted from the spreadsheet. The columns may appear in any order.
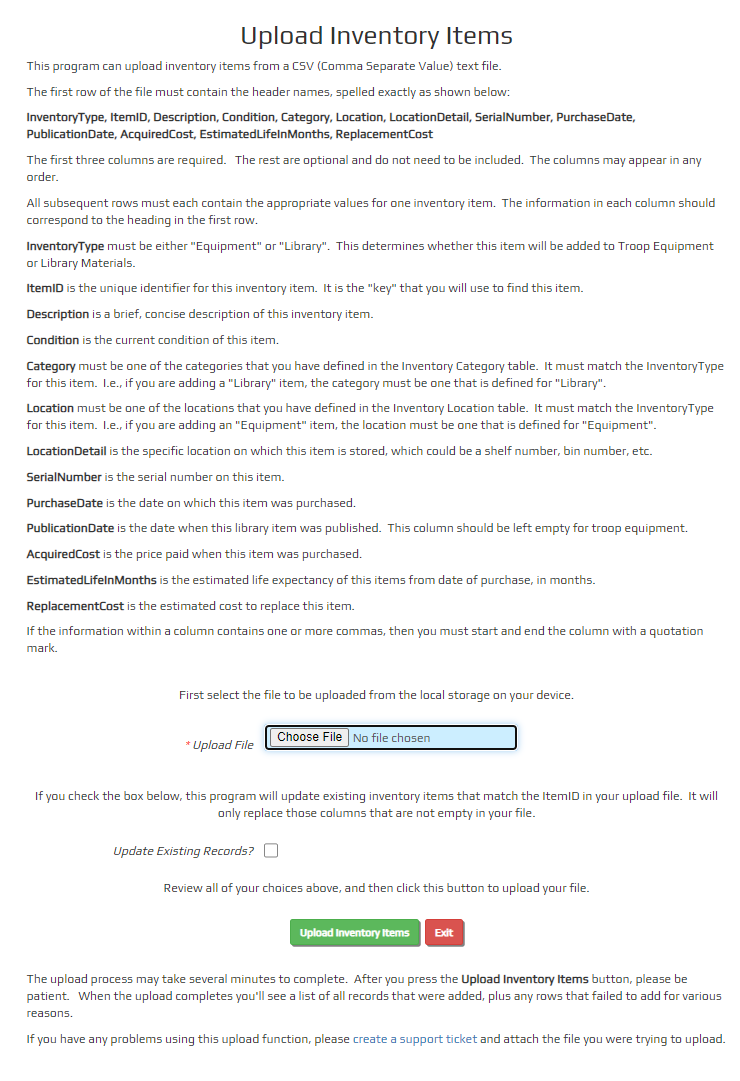
Begin by selecting your file from your local storage device.
If your file includes updates to inventory items that are already in your TroopWebHost site, check the Update Existing Records box.
Click Upload Inventory Items to begin the upload.
The upload may take a few minutes to complete. When it does, at the top of the page you will see a list of any errors, followed by a list of the rows that were updated, and a list of the rows that were added.
Inventory Categories
Every inventory item can be assigned to a category. You can define those categories by going to Site Configuration → Inventory Categories, as shown here.
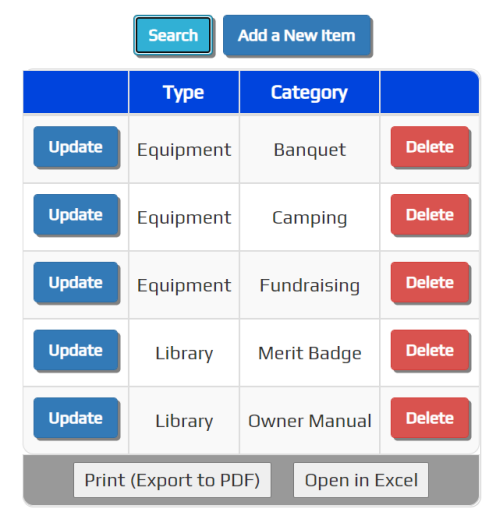
Click Add a New Item to add a category to this list.
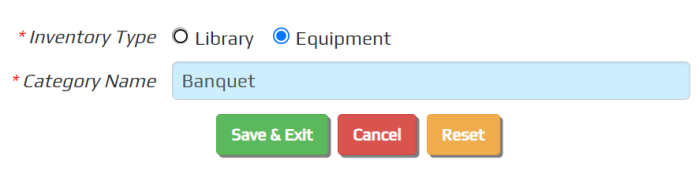
Each category applies either to Library or Equipment items.
Enter a short Category Name that describes this category.
Click Save & Add Another to continue adding entries, or Save & Exit to save this entry and return to the list.
Inventory Locations
Every inventory item can be assigned to a location. You can define those locations by going to Site Configuration → Inventory Locations, as shown here.
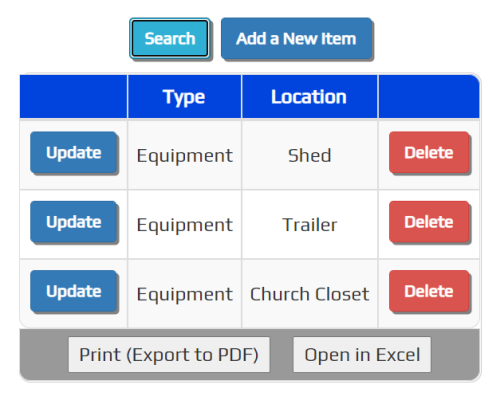
Click Add a New Item to add a location to this list.
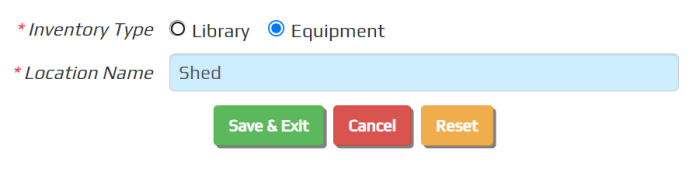
Each location applies either to Library or Equipment items. If you don't have more than one location for a given type of inventory, then you may not need to create a location for that type, since the location is optional on the inventory record.
Enter a short Location Name that describes this location.
Click Save & Add Another to continue adding entries, or Save & Exit to save this entry and return to the list.
Check-in / Check-out
Two functions to check in and check out inventory are available from the Inventory menu:
- Library Check-in / Check-out
- Equipment Check-in / Check-out
Both functions begin by displaying a list of troop members, as shown below.
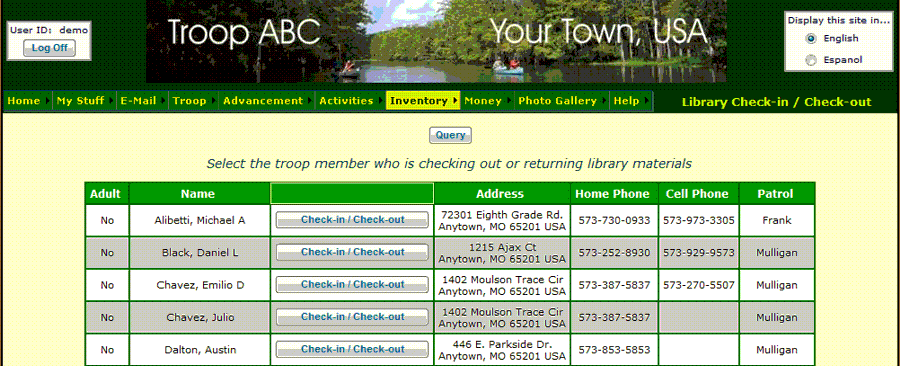
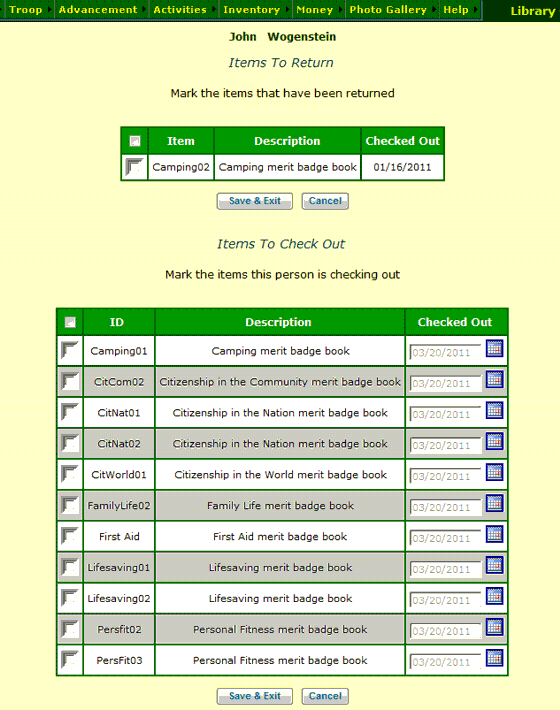
Click Check-in / Check-out next to a troop member to check in and/or check out items to that member.
If this member already has items checked out, you will see those items listed in the first grid.
You can check an item back in simply by clicking on the checkbox next to that item.
The second grid shows all of the items that are not currently checked out.
You can check out any of these items to this member simply by clicking on the checkbox next to that item.
Click Save & Exit to save your work. Although there are two Save & Exit buttons on the page, either button will save both checked in items and checked out items.
Troop members can check out Library Materials and Troop Equipment to themselves using functions on the My Stuff menu, but they cannot check their own items back in.
Quick Check-In
When all you need to do is quickly check in inventory items, there are single step functions available from the Inventory menu:
- Quick Library Check-in
- Quick Equipment Check-in
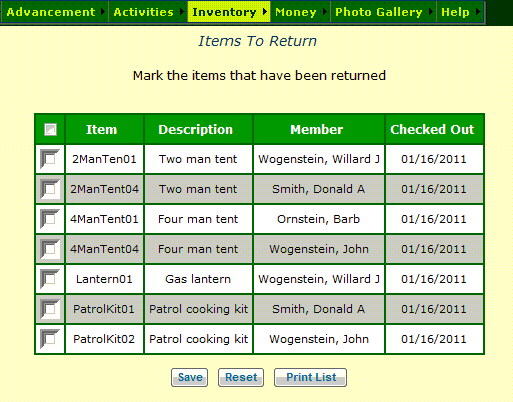
Both functions begin by displaying all of the items currently checked out, as shown at right.
Click on the checkbox next to each item that has been returned.
Click Save to save your work. The screen will redisplay without the items you just checked in.
Inventory FAQ
Is there a way to track the value of the troop's inventory?
No, that's beyond the scope of this system.
Businesses need to track the value of their inventory as part of their overall asset valuation, which is necessary for GAAP accounting. Businesses may also need to borrow against the value of their inventory.
Scout troops are not businesses and do not have these requirements.