Photos and Videos
 It's fun to share photos and videos of your troop's activities.
It's also a great way to attract new families to join your troop.
By default, the Photo Gallery and Video Gallery are both accessible to the public without logging on. However, you can remove them from public access as shown on our Set Photo Gallery Access page.
All photos and videos must be associated with an event. When you upload photos or videos, you begin by picking the event they were from.
Photos will be resized when they are uploaded to our server to save space. From the Site Appearances page you can control how large of an image will be stored. You can also choose to store an archive copy of each photo at a much higher resolution for later download. This may result in additional charges the next time you renew your subscription.
Photos may be uploaded directly to your site, either one at a time or in groups.
Videos are uploaded to YouTube™. You then create links to each video on your site to populate your Video Gallery.
Upload & Maintain Photos
Select Upload & Maintain Photos from the Photo Gallery menu to upload photos from recent troop events.
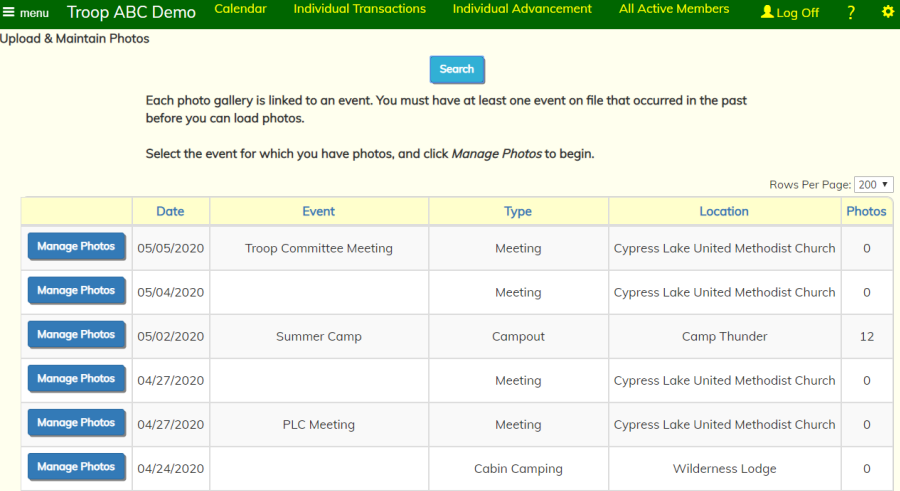
Photos must be associated with an event. Select your Event and click Upload Photos.

Write a brief summary of the event in Highlights. This description will be displayed at the beginning of the Photo Gallery slide show.
Click Save to save your work.
You can either upload photos one at a time, with the option of writing a caption for each one as you go, or you can upload a group of photos with no captions.
Click Upload Multiple Photos to quickly upload a group of photos to your site.
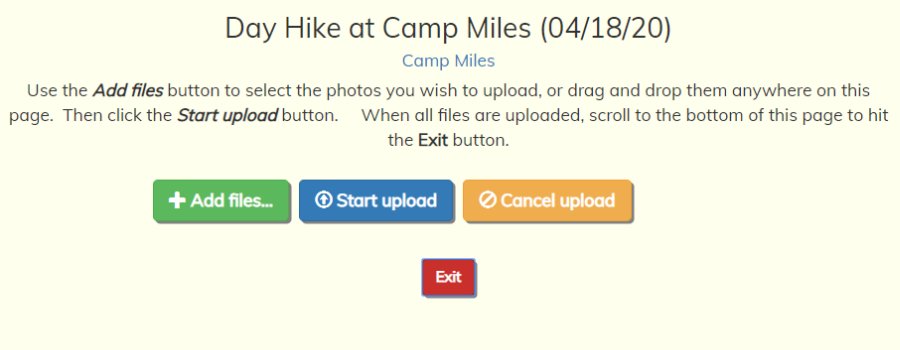
Click Add Files to select a group of files to upload, or drag and drop them anywhere on the page, or copy and paste them into the page.
A list of files should then appear, as shown here.
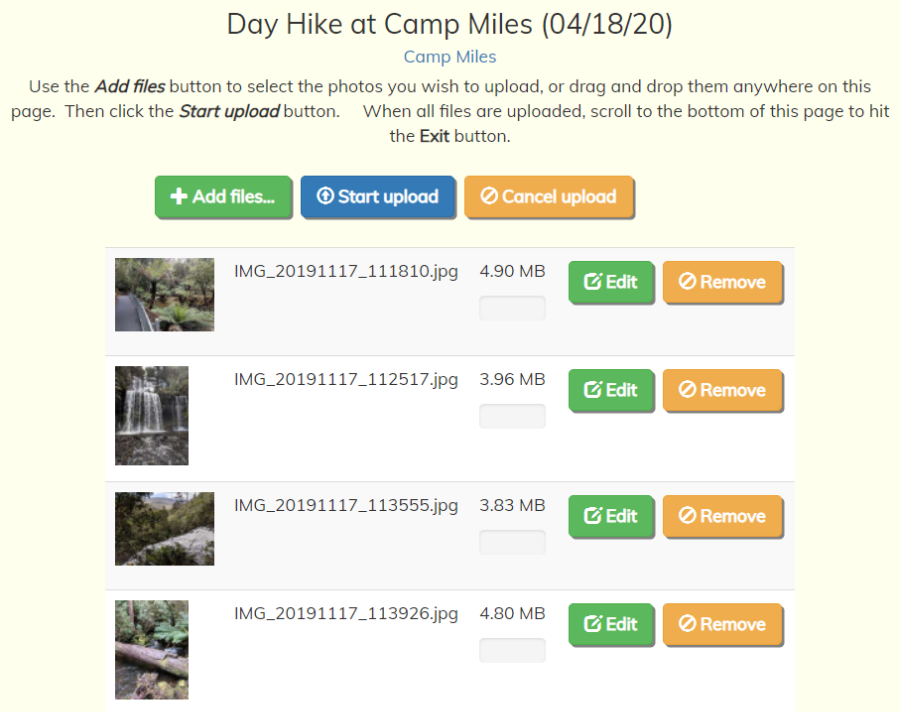
Use the Edit button to crop or rotate your images before uploading them. This tool is not available after the photo has been uploaded to the server.
Click Start Upload to begin transferring the photos to the server. The photos will be resized to fit within the limits you configured on the Site Appearances page.
Once the upload has completed, scroll to the bottom of the page and click Exit to return to the previous page.
You will now see all of the photos you uploaded listed down the page.
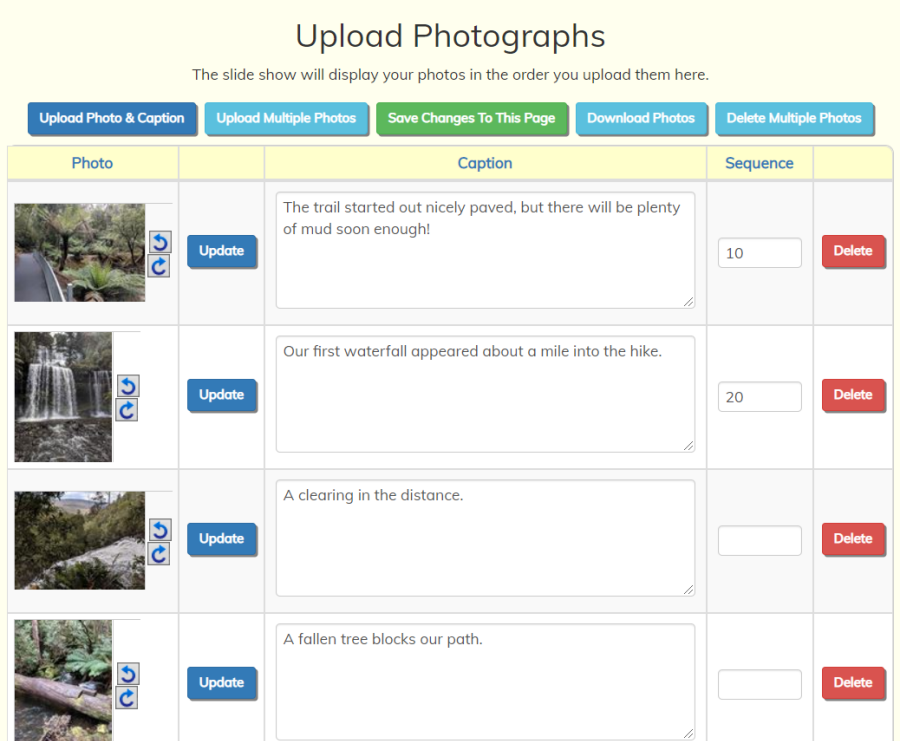
Enter a Caption for each photo and use the Sequence field to control the order in which they will be displayed.
Be sure to click one of the Save buttons at the top of the page to save your work.
Search Photos
Looking for that special photo you remember from a few years back, but can't remember which event it was for?. The Search Photo function can help you find it!
Select Search Photos from the Photo Gallery menu to bring up the search page:
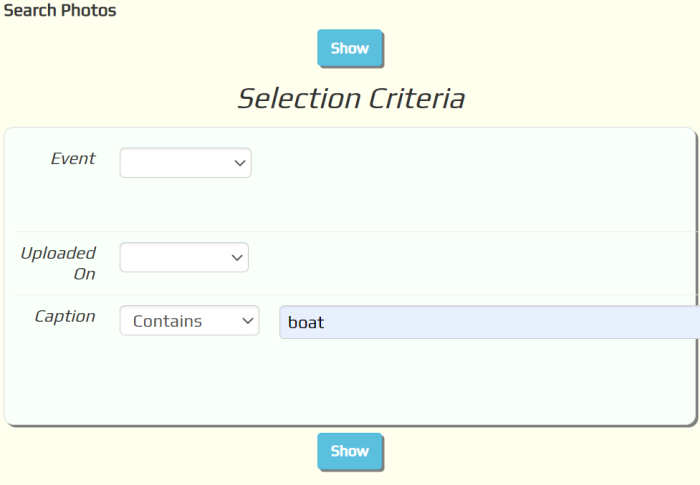
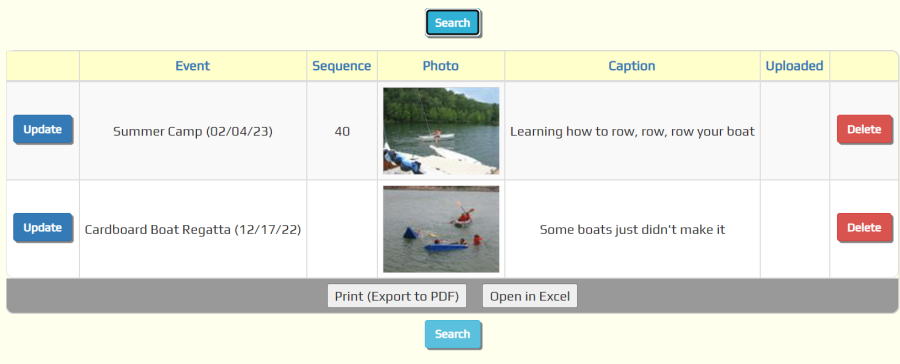
Enter your selection criteria, then click Show to see the results.
Download Photos
You can use TroopWebHost as your troop's photo repository. Use the Site Appearances page to control the maximum resolution at which images will be stored. It is not necessary to select the Save High Resolution Image (Archive Only) option to use this feature, although that option will significantly improve the quality of the images you can download.
To download the photos from a given event, go to Photo Gallery → Download Photos. This function is also available from Upload & Maintain Photos page after you select an event.
This function is only available to your Site Administrator and users who have a User Role authorized for the Download Photos task.
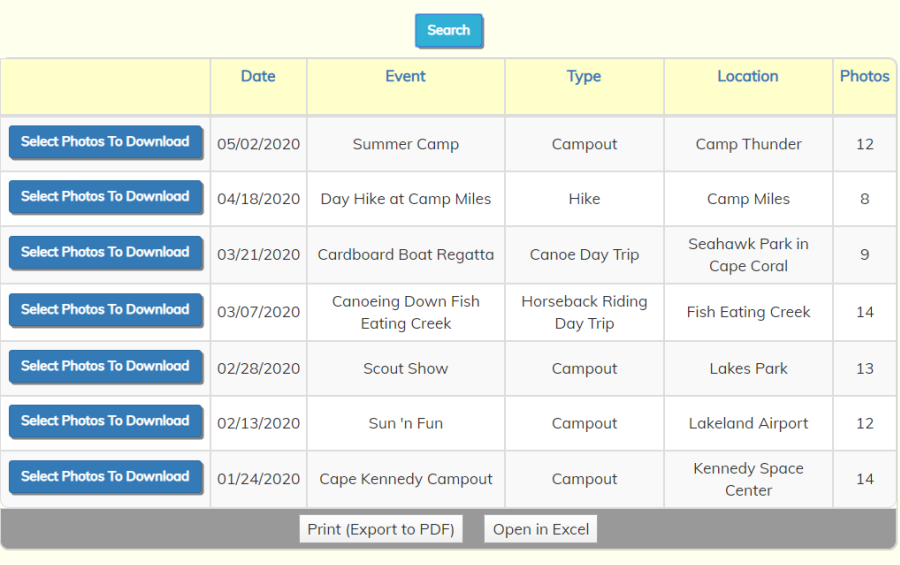
This page only displays events that have photos. To begin downloading the photos for an event, click the Select Photos To Download button next to that event.
This will display a list of the photos for this event, as shown below. Click on the checkbox next to each photo you wish to download.
Note that you can click the checkbox in the header row to select all photos. Click there again to clear all of your selections.
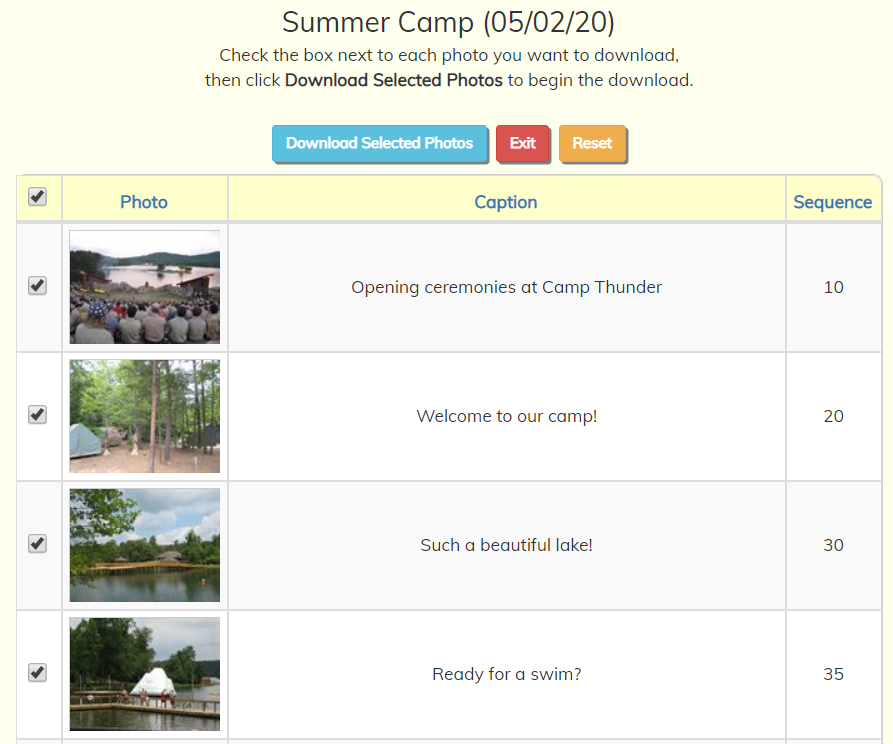
When you have selected all of the photos you wish to download, click on Download Selected Photos. This will create a zip file containing all of the photos, which will be transferred to your device.
If we have a high resolution archive copy of the selected photo, that high resolution image will be the one that we download. If not, we will download the highest resolution copy available of that image.
Depending on the number of photos you selected, the size of the images, and the speed of your Internet connection, the download may take a little while. Please be patient and wait for it to complete.
What happens next depends on the browser you are using. For example, if you are using Chrome on a PC, you may see something like this in the lower left corner of your browser window:
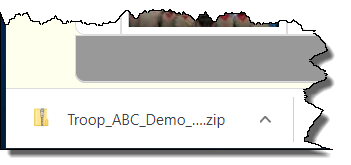
Follow the steps appropriate to your browser to save the zip file to the desired location, then extract the files from there.
Delete Photos
So you just uploaded 150 photos from your last campout and discovered that not all of them are "keepers"? Don't worry, there is an easy way to get rid of the photos you no longer want.
Select Delete Photos from the Photo Gallery menu to delete multiple photos from an event in one operation. This function is also available from Upload & Maintain Photos page after you select an event.
This function is only available to your Site Administrator and users who have a User Role authorized for the Delete Multiple Photos task.
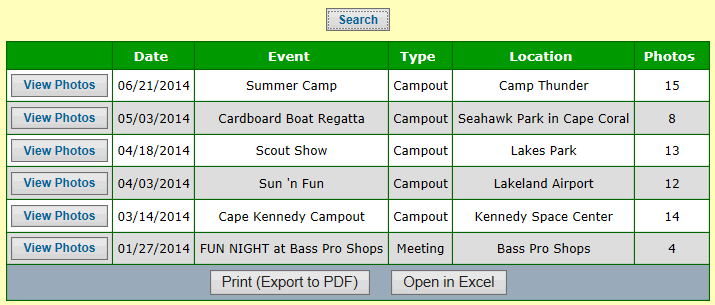
This page only displays events that have photos. To begin deleting the photos for an event, select the Event and click View Photos.
This will display a list of the photos for this event, as shown below.
Click on the checkbox next to each photo you wish to delete.
Note that you can click in the checkbox in the header row to select all rows. Click there again to clear all of the rows.
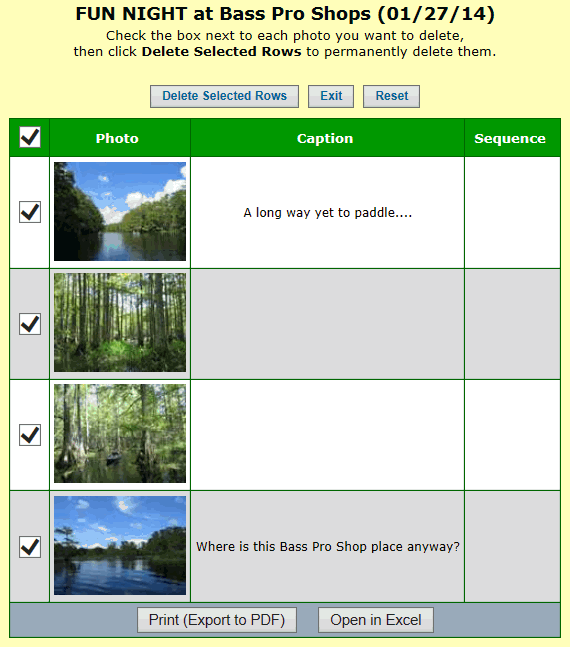
When you have selected all of the photos you wish to delete, click on Delete Selected Rows.
The system will display a pop-up message to confirm that you wish to delete these items.
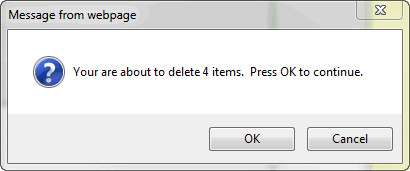
If you click OK the system will proceed with the deletion.
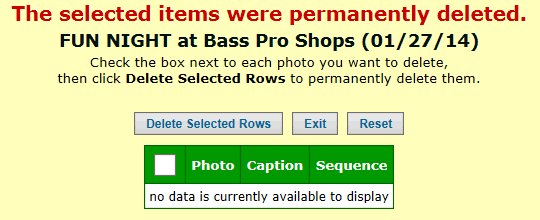
Click Exit to return to the list of events with photos.
Maintain Video Links
YouTube™ makes it easy to share videos that you've uploaded to their site.
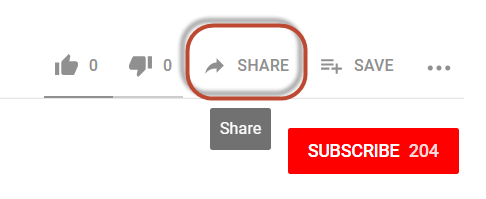
Once you've added your video to YouTube, click on the Share link which you see circled in red in this image.
This will open up a new section on the page that contains this section:
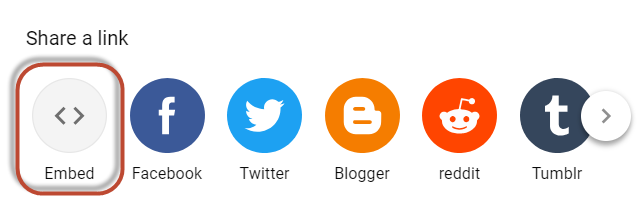
Click the "Embed" link, circled above, to view the code that you need to copy, as shown here:
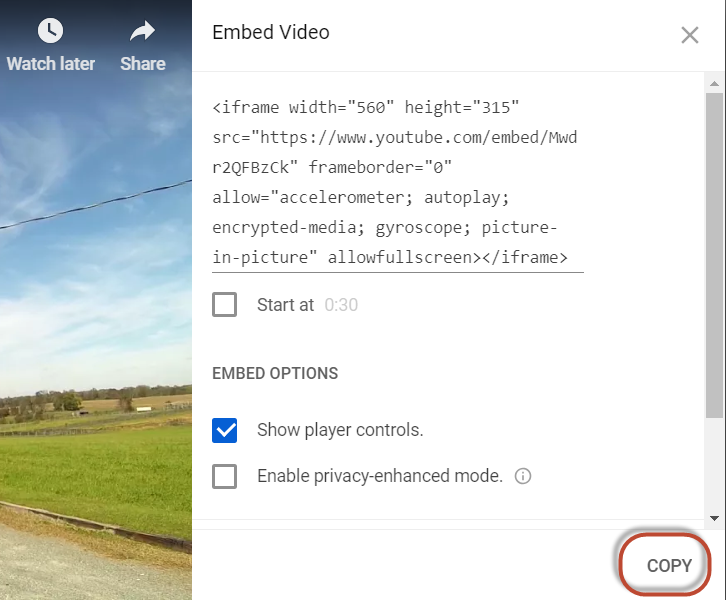
Click the "Copy" link, as circled above, to copy the code into your computer's clipboard.
Select Maintain Video Links from the Photo Gallery menu to add this video to your Video Gallery.
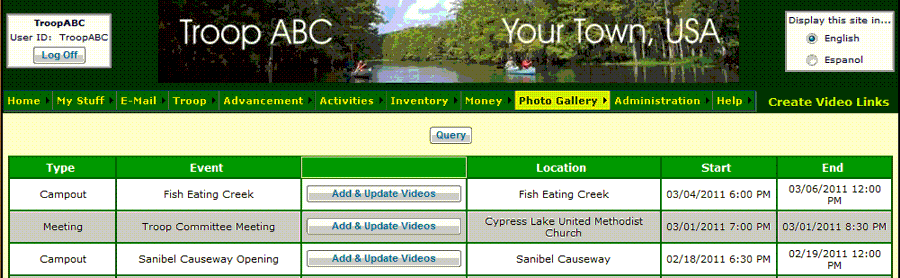
Videos must be associated with an event. Select your Event and click Upload Photos.
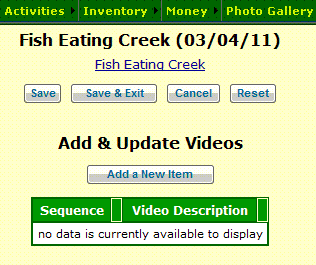
You should see a page like the one shown at right.
Click Add a New Item to create a link to your YouTube video.

Write a brief description of this video in the Caption box. This will be displayed in the Video Gallery.
Paste the text from the YouTube Embed link (as described above) into the Video Html Link box.
You can use the Sequence Number to change the order in which the videos for this event are displayed in the Video Gallery.
Click Save & Add Another to save this video and begin adding another one.
Set Photo Gallery Access
By default the Photo Gallery is available to the public without logging on. This allows you to give prospective new members a better idea of the exciting activities your troop offers.
Some parents are not comfortable with this approach, and would prefer to keep the photo and video galleries private.
You'll need to do two things to remove your photos from public access:
- Use the Override Public Access page to eliminate public access to the Photo Gallery pages.
- Update the settings on the Photo Gallery Preview widget on your home page to eliminate public access.
You can always restore public access later by reversing these changes.
Gallery FAQ
 Our troop just subscribed to TroopWebHost. When I tried to upload photos I couldn't see a way to do it.
What am I missing?
Our troop just subscribed to TroopWebHost. When I tried to upload photos I couldn't see a way to do it.
What am I missing?
Photos and videos must be associated with an event that occurred in the past (we figure you can't take pictures of something that hasn't happened yet, right?). When you purchase your site there are no events loaded, so there's nothing to link to.
If you add an event that occurred in the past, you should be able to upload photos for it.
How do we make our photo and video galleries private so the public cannot view them?
From the Site Configuration menu, select Set Photo Gallery Access. This will allow you to make the photo and video gallery pages private. It will also control whether photos from recent events will appear on the left side of the home page before you log on.