Authorized users may enter inventory transactions for those Sales Campaigns that have been configured to track inventory, by selecting the Inventory Adjustments item on the Sales menu.
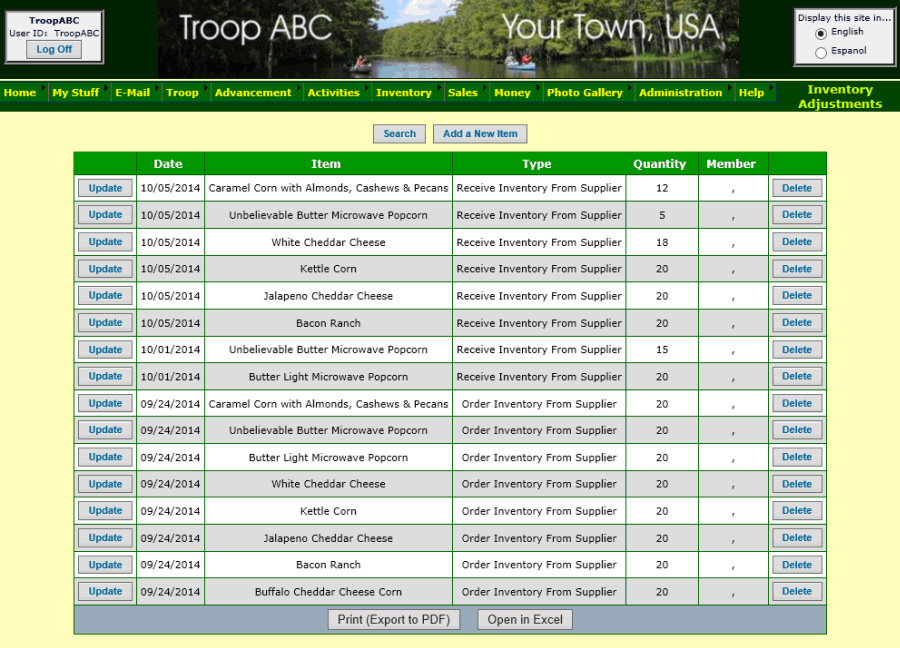
This page displays the inventory adjustments you have already entered.
Add an inventory adjustment whenever you:
- Order items from your supplier
- Receive items from your supplier
- Issue items to your troop members (e.g., for sales at a booth)
- Account for lost or damaged items
Click Add a New Item to enter a new inventory adjustment.
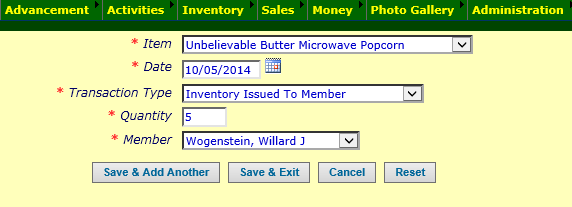
Select the item for which you are entering the adjustment.
The date is the date on which this event occurred.
The transaction type determines the effect of this adjustment, as controlled by the
Inventory Transaction Type table.
The quantity is the number of units affected by this adjustment.
If you selected a transaction type that involves a troop member, you will be required to select a troop member from the dropdown box.
Click the Save & Add Another button or the Save & Exit button to save your work.
You can view your current inventory balances by selecting Merchandise Items from the Sales menu.
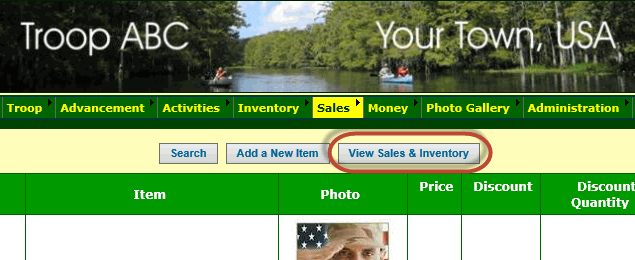
Click the View Sales & Inventory button to view an alternative version of this list.
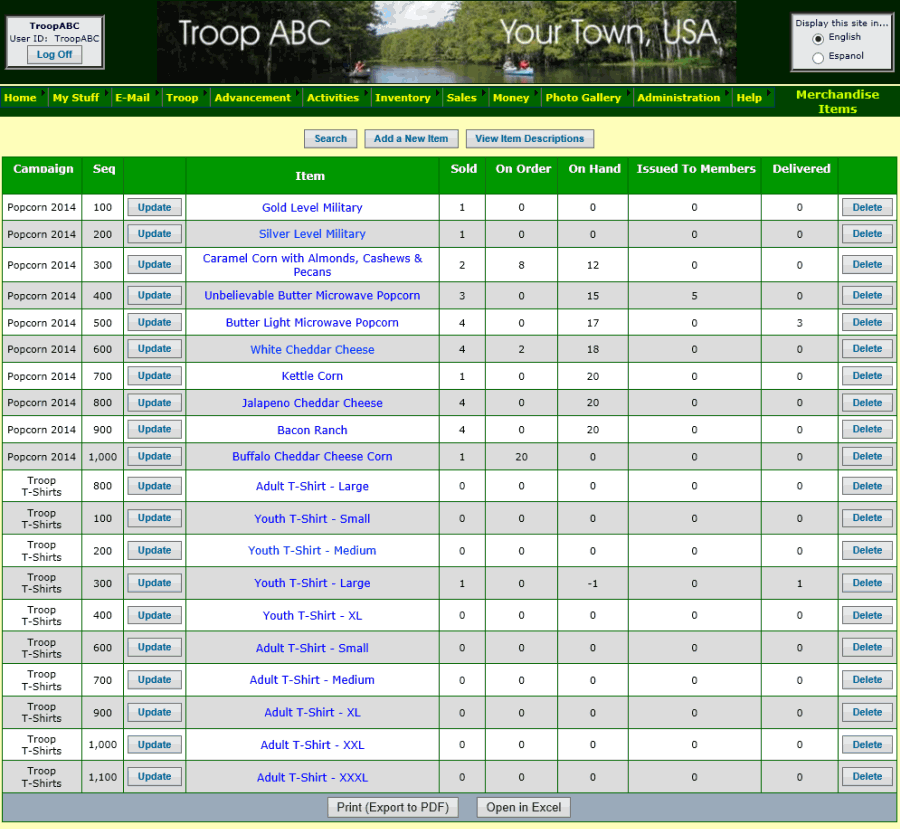
The following columns show the effect of your inventory adjustments:
- On Order shows how many items have been ordered from your supplier that have not yet been received.
- On Hand shows the number of items that have been received and not yet delivered to customers or issued to members.
- Issued To Members shows the number of items that have been issued to members and not yet delivered to customers.
You can view the transactions for an individual item by clicking Update next to that item.
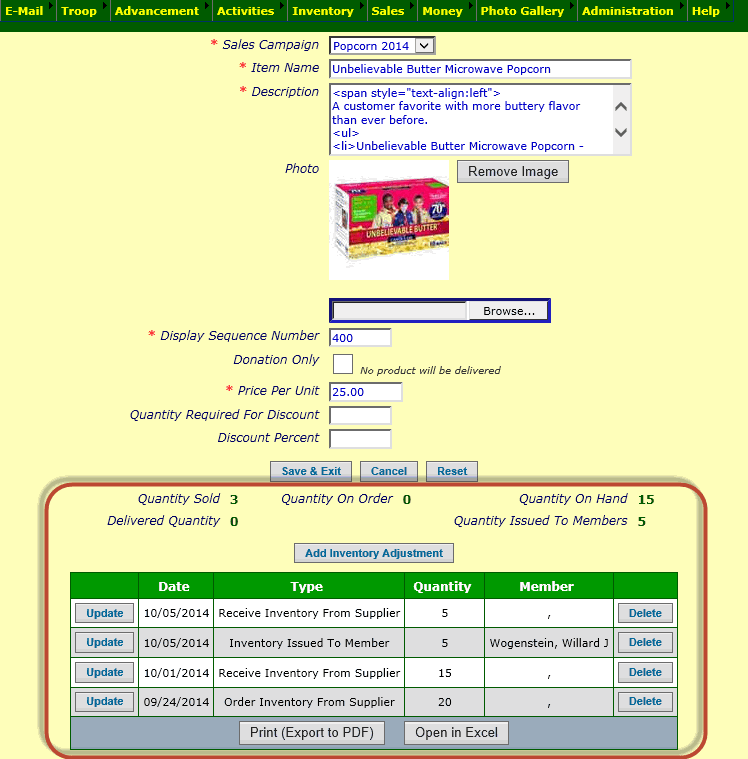
The area at the bottom of the page shows the balances for this item and the inventory adjustments.
You can also add, update, and delete inventory adjustments from this page.