The Contact Us widget allows non-members visiting your site to post a message to your troop leaders.
The type of message can determine which leaders are contacted.
You can add the Contact Us widget to the Home page or any custom page
by going into edit mode
on that page and clicking one of the plus signs (+) to add a new section.
Obviously, this should only be added to a page that is visible to the public.
As shown below, select a Section Type of "Widget", then select "Contact Us Form" as the Widget Type.
Do not select a Maximum Width less than 480, as the entry fields will not fit in any narrower width.
Do consider choosing a Background Color and enabling both the Border and
Shadow properties.
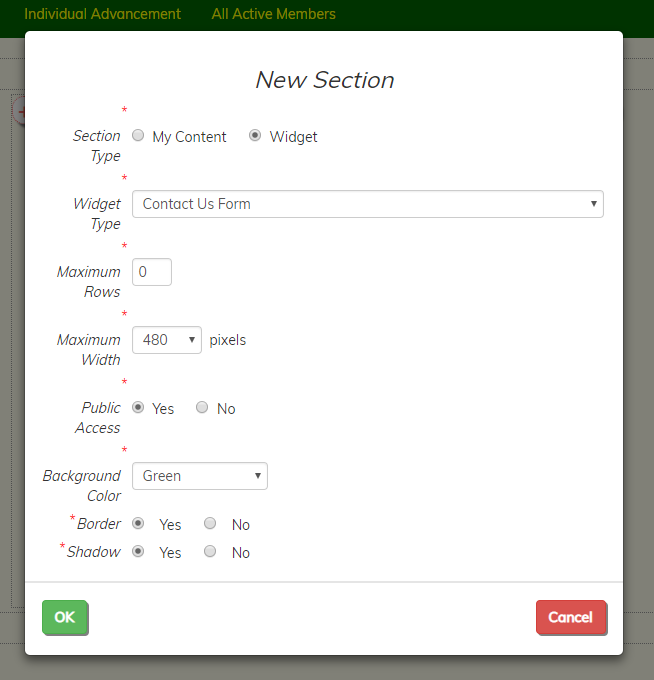
Click the OK button to save this widget. It will then be inserted into your page, as illustrated here:
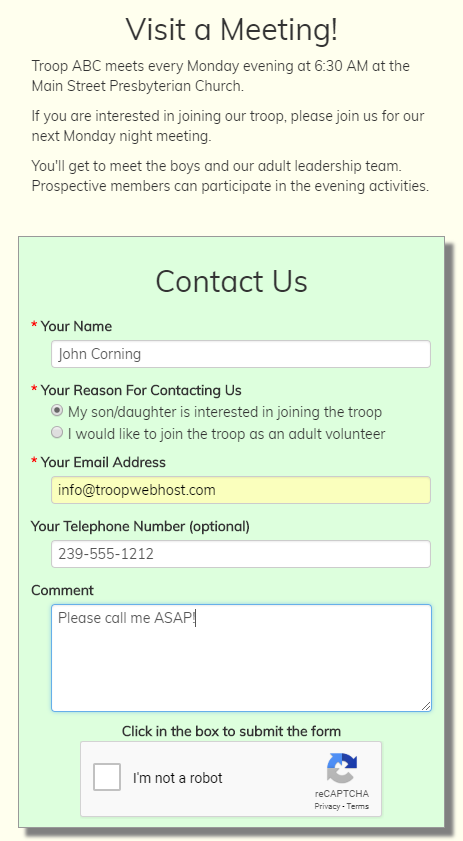
The reCaptcha control will not display until the user enters information into the first three fields.
When the user fills out the form and clicks on the reCaptcha box, the information will be saved to the contacts table and an email will be sent to selected leaders.
"Which leaders?" you might be asking. That's what we're going to talk about next.
You may have noticed that Your Reason For Contacting Us lists the possible reasons this person is
contacting your troop. You can configure this list by going to Site Configuration → Contact Us Reasons.
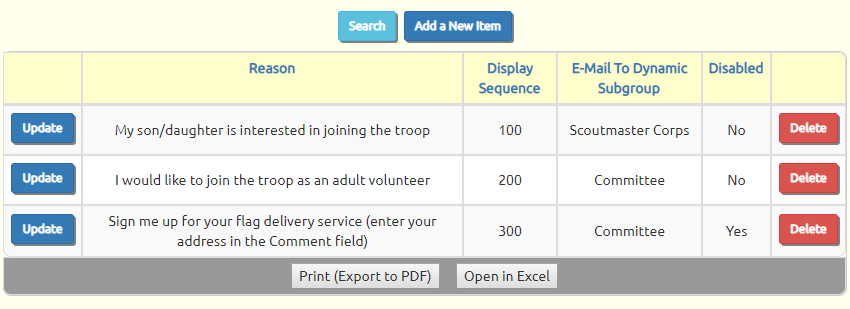
This is where you maintain the list of reasons that will be available on the Contact Us form.
Click Add a New Item to add a new reason, or click Update on any row to update that row.
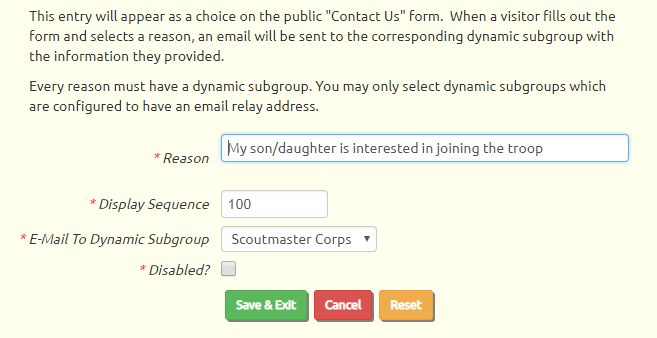
The Reason is the text that will be displayed on the form.
It should be considered from the perspective of the visitor who is filling out the form. Here are some examples:
- My son/daughter is interested in joining the troop
- I would like to schedule a visit to your troop
- I am interested in joining as an adult volunteer
- Sign me up for your flag display fundraiser (enter your address in the comment field below)
The Display Sequence is a number that determines the order in which this entry will appear on the list, relative to the other entries.
E-Mail To Dynamic Subgroup determines who will receive the message when this reason is selected. If you are not familiar with Dynamic Subgroups,
please read this page of this User Guide to learn how to create them.
You must select a Dynamic Subgroup for each contact reason. When a user selects this contact reason and submits the form,
an e-mail will be sent to each member of the corresponding Dynamic Subgroup.
If the drop down list is empty, this means you have not yet created any Dynamic Subgroups. You must create at least one
Dynamic Subgroup
before you will be able to create or modify any contact reasons.