Select Send E-mail from the E-mail menu to begin creating an e-mail.
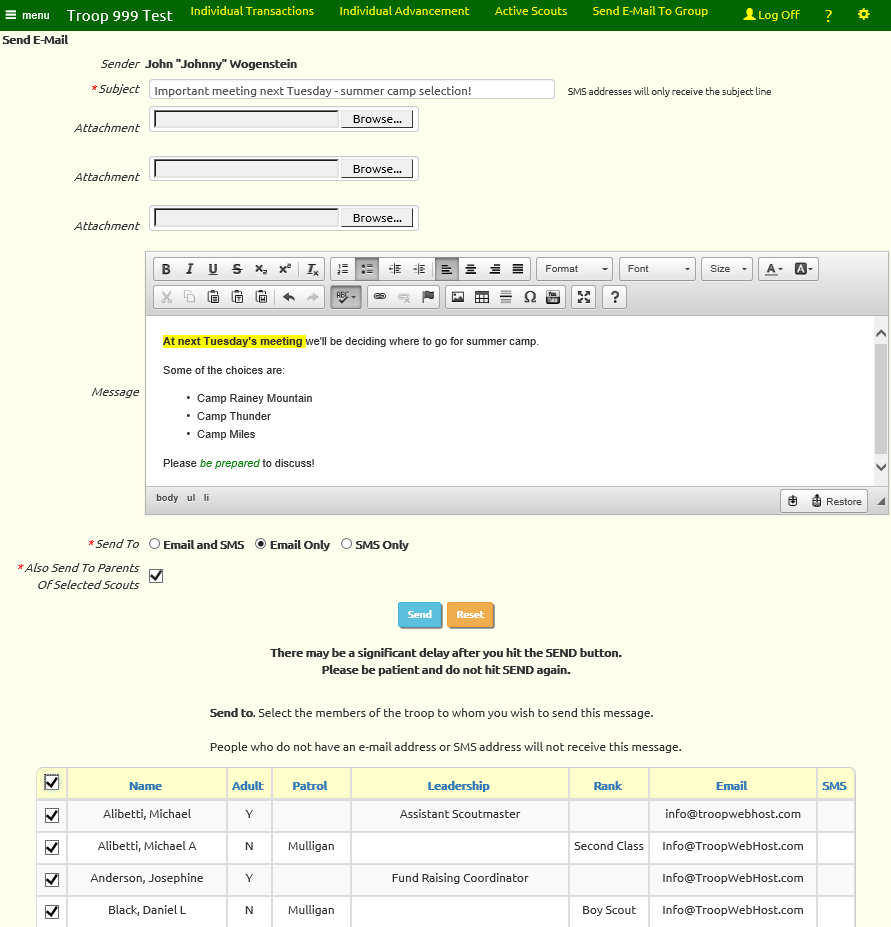
The Subject is the title of the message that will be displayed in each recipient's in-box.
This is the only portion of the message that will go out in an SMS text message, so if you are sending this message to SMS be sure the subject line has enough information to be meaningful.
Click the Browse button to add an Attachment to your e-mail.
This can be any kind of file or document that is on your local drive.
Attachments are uploaded to the troop web site.
Your e-mail will contain a link to the attachment.
You may have up to three attachments on each e-mail.
Please be aware that e-mail attachments, once they are uploaded to the server, are accessible to anyone who knows the URL of that file.
You should never use this function to send a document that contains confidential information.
The body of the message is composed using a full-featured text editor.
You can add special formatting by using the controls at the top of this section.

Hover your cursor over any of the controls to view a tool tip describing its function.
From left to right, they are:
- Bold
- Italic
- Underline
- Strike-through
- Subscript
- Superscript
- Remove formatting
- Numbered list
- Bullet-point list
- Decrease indent
- Increase indent
- Left-justify
- Center
- Right-justify
- Justify full
- Type of section
- Font
- Font Size
- Font Color
- Background Color
- Cut
- Copy
- Paste
- Paste as plain text
- Paste from Word
- Undo
- Redo
- Spellcheck
- Insert hyperlink
- Remove hyperlink
- Insert anchor
- Add image (the image must already be on a web site)
- Create a table
- Horizontal rule (creates a horizontal line across the page)
- Insert special character (like ™)
- Embed a YouTube video
- Maximize - enables full screen editing
- About
You can insert photos into your message by dragging them into the message editor window. You can then resize the image by dragging its lower right corner.
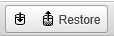
In the lower right corner of the editor window you'll see a Restore button. This allows you to view previous versions of the message you have composed with this editor.
If you accidentally lose your message you may be able to use the Restore button to bring it back!

You may choose to send to E-Mail addresses or SMS addresses, or both, by clicking the appropriate radio button below the message editor.
Click the Send To Parents Of Selected Scouts checkbox to send a copy of this e-mail to the email addresses of the parents of any scout you selected as a recipient.
The default value for this selection, along with other settings that will affect all e-mails sent from the site, may be set by your site administrator in
the Configure E-Mail Settings page.
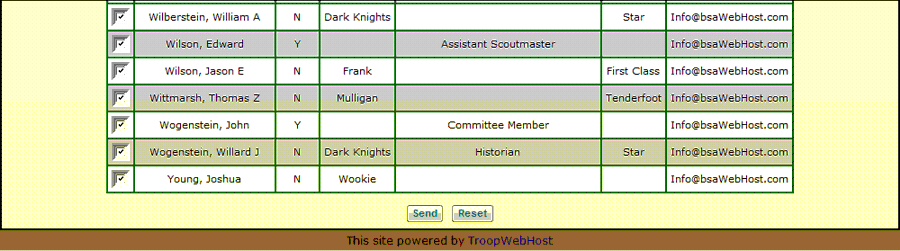
Click on the checkbox next to the name of each troop member to whom you wish to send this message.
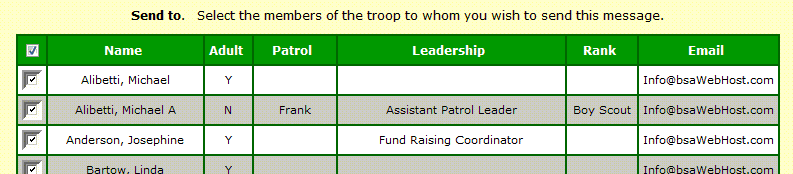
Notice that there is a checkbox in the header row of this grid.
If you click on that box it will select ALL of the members of the troop.
If you click it again it will un-select all members.
Here's another tip: like all data grids in TroopWebHost, if you click on the column heading it will sort the list based on the contents of that column.
Click again and it will sort in the reverse order.
When you are ready to send this message, click the Send button. You'll find the Send button at the bottom of the page, as shown below, in addition to the one that is
directly above the recipient list.
If you selected a large number of recipients there may be a significant wait before you see the e-mail confirmation page. Please do not hit Send a second
time as this may cause your recipients to receive two copies of the message.