Select Maintain Events from the Calendar menu to begin adding events to your calendar.
The two tabs on this page allow you to view upcoming events, going forward in time, or past events, going back in time.
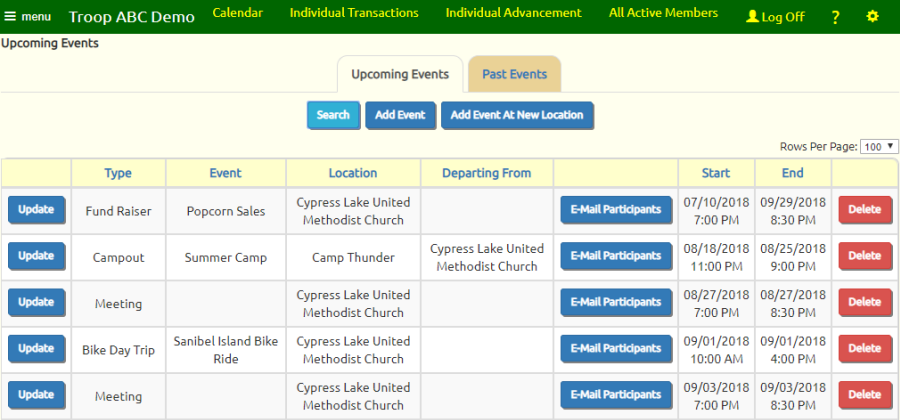
Click Add Event to add a new event for which you already have an Event Location on file.
Click Add Event At New Location to create a new event location and a new event, in that order.
Either way you'll eventually end up at a screen that looks like the one below.

This page has several tabs that allow you to enter information about this event. The first tab is "Details".
Select an Event Type from the drop down list. You can control the types of information that can be gathered for a given type of event by updating the
Event Type table. So, for example, if you do not see the Leaders fields after you select an event type, you can update that Event Type to include those fields.
The Event Name will be displayed on the calendar and other event and financial pages. If this is not supplied the Event Type will be displayed.
The Location should always be the destination for this event. If you are leaving from a drop-off location, like your regular meeting place,
select that location in the Departing From / Return To field. For events that do not require travel, you may leave the Departing From / Return To field empty.
The drop down lists for locations consist of the entries in your Event Locations table. If you do not see the
location you need, you may add it by going to Calendar → Maintain Event Locations and clicking Add a New Item.
The Scheduled Start is when you expect everyone to be at the departure location.
The Scheduled End is when you expect to return to that location.
The Dress Code lets you select a value that you've configured in the Dress Codes table.
The Sign-up Start Date allows you to control when users may begin signing up for this event.
The Sign-up Deadline allows you to prevent users from signing up for this event after the specified date. If you enter a date in this field, users will not be able to sign up for this
event from the My Stuff menu or the Troop Calendar after this date. You will still be able to update the planned attendance from the Sign-Up List tab
(shown later on this page) or the Sign Up Members page.
The Estimated Cost is for informational purposes only. It does not have any effect on the accounting system.
The Minimum Balance Required To Sign Up overrides the minimum balance that was configured for this event type.
Scouts who have less than this amount in their account when they try to sign up will be prevented from doing so.
Please note that this number can be negative; if you use a negative number then only those scouts who are already in arrears will be prevented from signing up for an event.
The Subaccount For Participant Balances should only be used for major events, like summer camp or Philmont, for which you've created a
separate Personal Subaccount to track member payments.
It should be left empty for most events.
When you do select a Subaccount For Participant Balances, when that event is viewed from the Calendar, the Current Balance shown for each participant will be
the balance of the selected subaccount. If you do not select a Subaccount For Participant Balances, the Current Balance shown for each participant will be the total balance of his primary subaccounts.
Community Service Hours is the number of service hours that will be credited to each participant. You can override this value for
individual participants when you Take Attendance.
Hiking Miles is the number of hiking miles that will be credited to each participant. You can override this value for
individual participants when you Take Attendance.
Backpacking Miles is the number of backpacking miles that will be credited to each participant. You can override this value for
individual participants when you Take Attendance.
Cycling Miles is the number of cycling miles that will be credited to each participant. You can override this value for
individual participants when you Take Attendance.
Paddling Miles is the number of paddling miles that will be credited to each participant. You can override this value for
individual participants when you Take Attendance.
Motorboating Miles is the number of motorboating miles that will be credited to each participant. You can override this value for
individual participants when you Take Attendance.
On The Water Hours is the number of on the water hours that will be credited to each participant. You can override this value for
individual participants when you Take Attendance.
Horseback Riding Miles is the number of horseback miles that will be credited to each participant. You can override this value for
individual participants when you Take Attendance.
Skating Miles is the number of skating miles that will be credited to each participant. You can override this value for
individual participants when you Take Attendance.
Limit Participation To allows you to select a dynamic subgroup.
This will prevent users who do not belong to that subgroup from signing up for the event. Users
who do not belong to the selected subgroup will not see the event on the Troop Calendar nor will it be included in the list of upcoming events in the
electronic newsletter or in their iCalendar subscription.
You can select the Leaders for this event from a list containing all active scouts and adult members.
Click the Tour Permit Submitted checkbox once you've submitted your Tour Plan for this event.
The Planned Activities will be visible to everyone in the troop on the
Calendar and the Automated Newsletter, so make it
fun, descriptive, and concise.
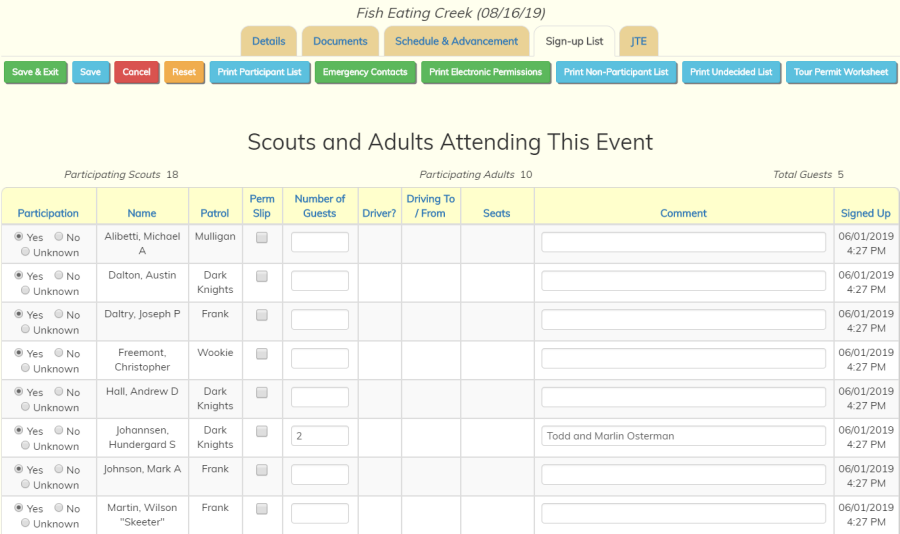
After you've saved your work, click on Print Participant List to print a list of the scouts and adults who have signed up for this event,
Print Non-Participant List to print a list of the scouts and adults who have indicated they do not plan to attend,
or Print Undecided List
to print a report showing those members who have not yet indicated whether they plan to attend.
Emergency Contacts will print the Emergency Contacts report for the scouts and adults who have signed up for this event.
The Tour Permit Worksheet button will produce a report that has a list of the participants, including vehicle and insurance information for the adult leaders who are driving.
This makes it easy to fill out your Tour Permit.
The second tab, Documents, lets you maintain a list of documents for this event. These can be files that you upload
to this site, or can be references to resources on the Internet.
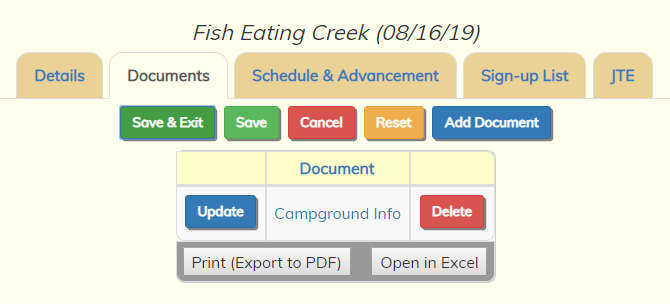
Click Add a New Item to add a new document to the list.
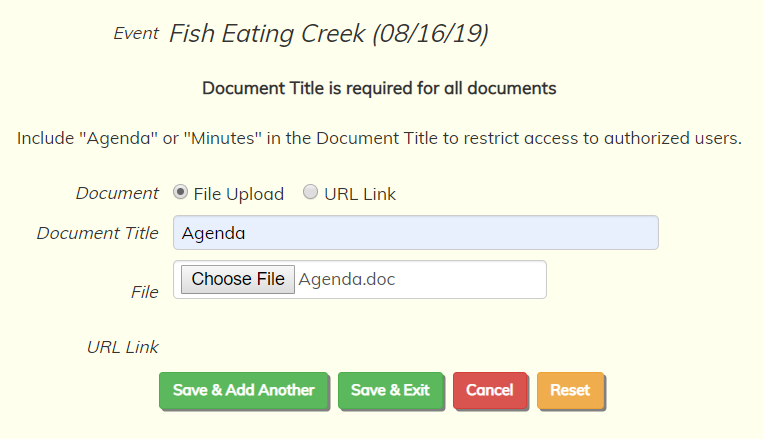
Select whether you wish to upload a file or enter the URL for an existing web resource.
Either way, you must enter a title for this document.
Use the File control to select the file from your local disk, or enter the URL in the URL Link field.
Then click one of the Save buttons to save this document.
The third tab, Schedule & Advancement, lets you enter meal plans, scheduled activities, and opportunities for advancement.
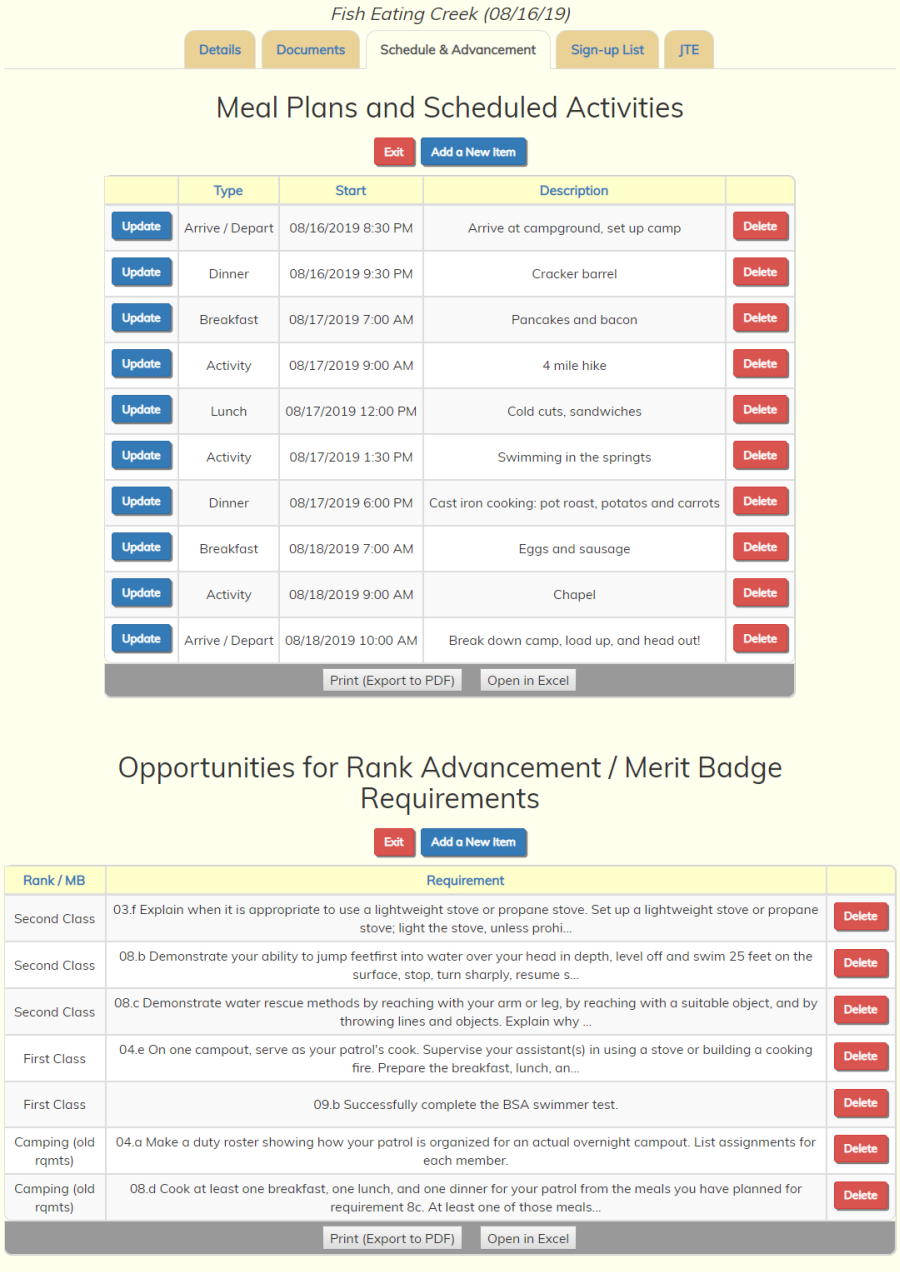
When you add activities to an event, the types of activities that you can choose are the ones that you set up in the Activity Types page.
The fourth tab, Sign-up List, as shown below, lets you check off the troop members who plan to attend.
After the event is over, you can use this page to note who actually attended; you can also use the Take Attendance pages for that purpose.
If you limited participation to the members of a dynamic subgroup, you will only see the members of that subgroup on this page.
Clicking on any tab will save your work. Click Save & Exit to return to the events list.
Scroll to the bottom of this page to see additional buttons.
At the bottom of this page you will see another set of buttons to save your work. Below these are buttons to send an e-mail about this event:
- E-Mail Participants will take you the Compose E-Mail page and pre-select the scouts and adults who are signed up for this event
- Invite Undecideds will take you to the E-Mail Invitation page and pre-select the scouts and adults who are Unknown for this event
Be sure to save your latest changes before using either of the e-mail buttons.
Add Group Transaction For Participants will only be visible if you are authorized for the Treasurer user role. It will allow you to create a group transaction to charge the participants.
If this event type supports shifts, you will also see a Shifts tab, which we'll explain later in this chapter.
We'll explain the JTE tab in the Journey To Excellence chapter.